How to Remove Support Marks From Your Minis
Tips to Make Your Mini Look Awesome Before Start Painting
You may have printed your own minis (with or without our help) and feel very proud of them. As you should! But then you go to peel the resin supports. Suddenly, deception strikes. You see support marks where you don’t want them. There are holes in focal points. Maybe you even damaged a spear point or lost a horn. It doesn’t matter how it happened. The result feels odd and unprofessional.
This might not sound like a big problem to the untrained eye. However, it actually is. Your next step is painting. As you apply layers of paint, a rough surface will look bad. Missing details, like weapons or creature parts, ruin the look. I gathered some tips to help you avoid this. These tricks make a huge difference when removing support resin. They can even make marks disappear completely. Let’s start learning!
Hot Water Method
We must start this guide with one of the most useful techniques: the hot water method. You might be printing minis yourself or buying a new board game. Either way, you will likely deal with tiny pieces full of details. The hot water method is ideal here. It helps preserve the unique aspects of the miniature.
Heating up the Water
Start by heating up the water to a comfortable degree. You should be able to put your finger inside and let it stay there for about five to ten seconds; that’s the ideal temperature. If you heat up the water too much, you may actually cause damage to your minis. The resin will be super flexible, and it will make them super flexible, way more than you want. So if you try to remove the supports, you will for sure remove parts of them.
Peeling the Supports
Do this the correct way, and they peel off easily. Sometimes, they peel perfectly with just a light touch. Want to be ultra-cautious? Cut the extra resin with a scalpel. Always respect the edges and shape of the piece. This takes extra time, but it is valuable. This is especially true if you sell minis or showcase your art. Be patient. You will peel off the support easily after cutting. The results will motivate you to use this process every time. But what about bigger pieces with fewer details?
Heat Gun Method
With larger miniatures, you may not need to be so cautious. Still, I don’t recommend removing the support resin with too much force. If you have a heat gun or even a hairdryer, it can help you get better results. Follow the same procedure that you used with the hot water method; don’t overexpose your pieces to high temperatures for too long. Again, it can make the material of your mini too flexible and it can tear it apart when you try to remove the support with your hands.
Use the heat gun for about five to ten seconds and also be sure to make a full rotation on it, targeting the whole piece evenly. The amazing benefit with this method is that you don’t need to dry the pieces or let them dry by themselves, which can take some precious time if you want to paint them afterwards or have to paint a lot of units in a short time. Don’t go for the heat gun method if you feel uncomfortable with any details. Even if it’s a big piece, if you check that it has many details you want to preserve, go for the hot water method.
Extra Tips
If you already have experience with 3D print and make your own minis you may have some doubts about when is the right time to apply the methods. And the thing is, it will vary depending on the quality of your models, but if you want to play safe, stick with me here!
You should apply the techniques before curing your minis. Why? Because after passing through the curing process, you may feel that peeling off the support can be a little more difficult. If the support were placed with care, you may not feel the difference, but if the support resin is too thick or placed without much attention by the producers, it can be really frustrating ripping a leg or an amazing weapon from your characters.
The golden rule here is removing the support marks before the curing process, and your results will be smoother and prettier. If you don’t have a curing station, you can use UV lights that you have in a bucket or even let them out in the sun, but if you are a heavy printer or you’re testing lots of different models, I strongly recommend buying at least the UV lights so your process can be way faster. Depending on where you live, sunlight can be really difficult to get to, so create your own cure station according to your budget, and you’ll get incredible results too!
Having tweezers on hand is also a really good idea, because some angles on your minis can be quite challenging to clean it. Use them on these tricky areas to remove small dots and points that the support can leave it and you will find professional level results.
At Loot Studios
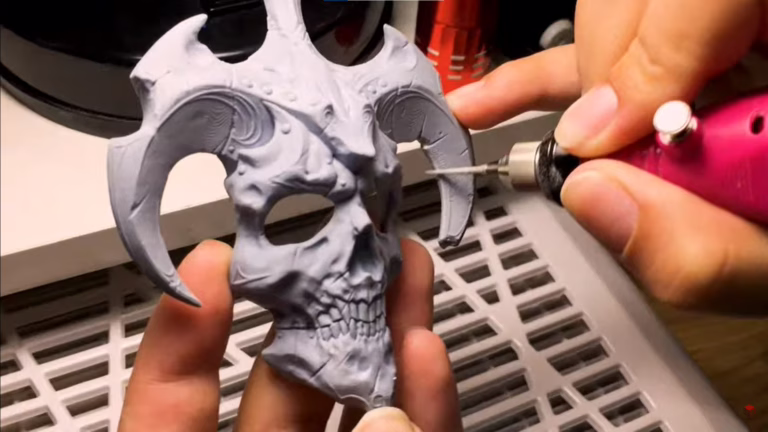
At Loot Studios, after the curing process, we use a corded multi-tool such as Dremel 300 for polishing the models even more, as well as sandpaper, for a more refined finishing.
WANNA KNOW A LITTLE BIT MORE ABOUT 3D PRINTABLE MINIATURES? CLICK HERE!
Small details can lead you to huge outcomes and this is valid not only to the painting process of your miniatures, as you could check on this post. The more you learn about the whole process of printing, storing, painting or whatever the better your experience will be. Now you can go and read our Beginner’s guide to paint your first mini, or, if you already know what you’re doing, check some tips on painting realistic skin.
Kudos for you for continuing to learn about the topic and can’t wait to see you next time! See you soon!
Loot Studios can help you paint highly detailed minis, statues, and props. Choose your favorite bundle from our previous releases or sign up for Fantasy or Sci-Fi to receive a new bundle every month. You can also check out some tips on our YouTube Channel.