Painting Clothing and Fabrics on Miniatures
Weaving Magic with Brush and Palette

Painting the clothes on a miniature is where the real storytelling begins. A flat, single-color cloak is just… fine. But a cloak painted with the rich, deep texture of velvet or the sharp sheen of silk? That’s what transforms a simple figure into a captivating work of art. But here’s the secret: you can’t paint wool the same way you paint silk.
The type of fabric dictates how you paint it. This guide will move past the basic “basecoat, wash, highlight” and dive into the pro-level techniques to make your miniature’s attire stand out. The entire trick is learning to paint an illusion of light—how it reflects, or how it gets absorbed.If you need something a little more visual, take a look at this video from our YouTube channel before we start:
If you need something a little more visual, take a look at this video from our YouTube channel before we start:
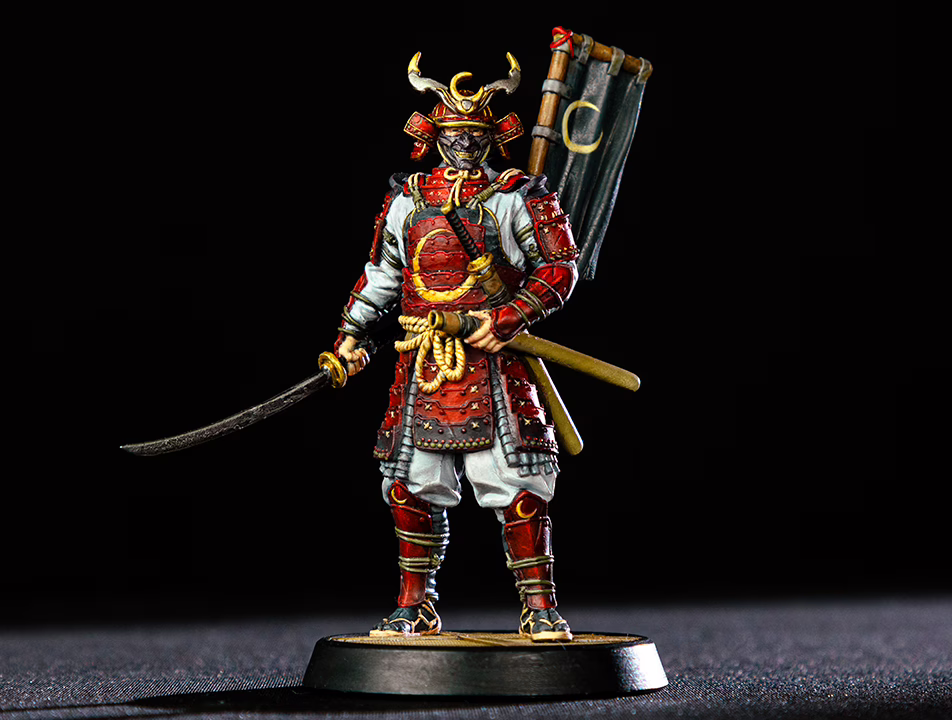
How to Paint Silk (The NMM Method)
Silk’s hallmark is its sharp, almost-metallic sheen. It’s all about high contrast.
The Common Trap:
A common trick is to mix gloss varnish into your paint. It’s clever, but it often just creates a mild “satin” finish, not a true, sharp sheen.
The Masterclass Technique:
Treat it Like NMM
The best way to paint silk is to treat it like Non-Metallic Metal (NMM). This means you will fake the reflection with paint.
High Contrast is Key
Your shadows should be very dark (your base color mixed with black or a deep complementary color). Your highlights should be very bright (your base color mixed with pure white or ivory).
Forget Smooth Blends
This is the “ah-ha!” moment. Do not blend this smoothly like skin. You want sharp, sudden transitions. On a cape fold, the very top of the fold should be almost white, and the side of the fold should be the deep shadow, with very little mid-tone in between.
The Varnish Trick
When you’re done, paint the entire thing with a matte varnish to unify the finish. Then, come back with a brush-on gloss varnish and only apply it to those brightest, almost-white highlights. This makes them “pop” and sells the illusion.
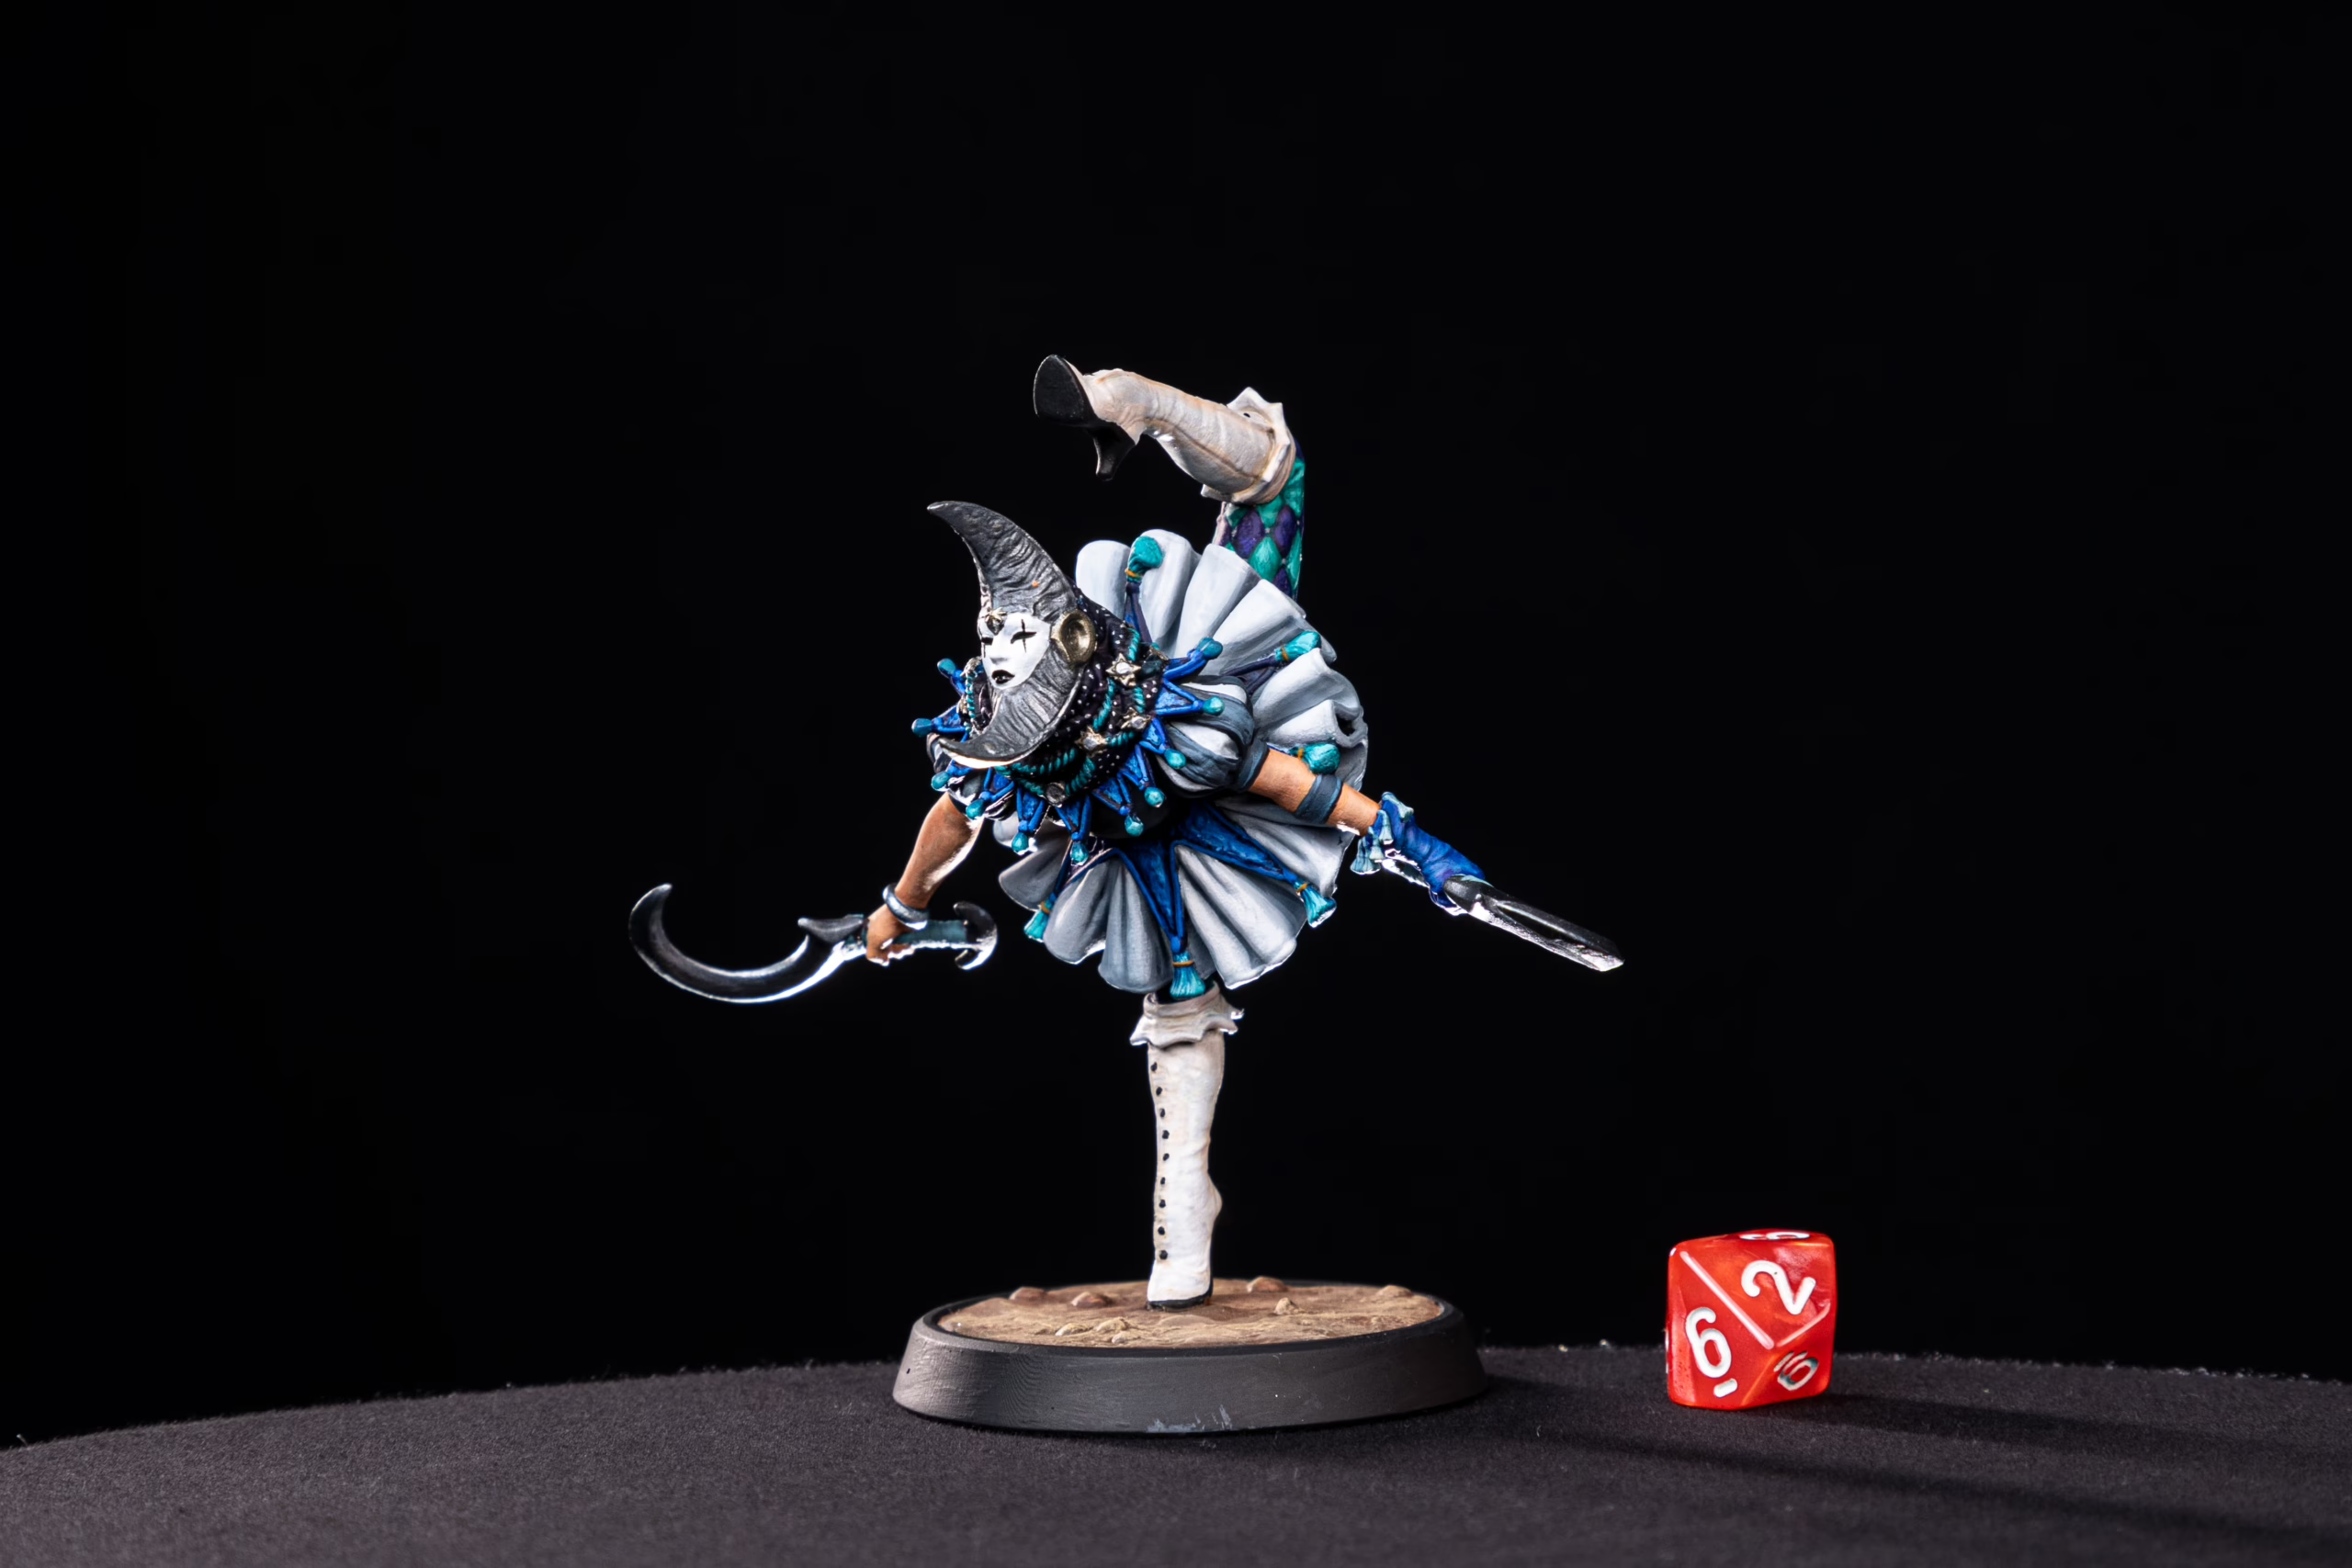
How to Paint Velvet (The Light-Sponge Method)
Velvet is the opposite of silk. It’s a “light sponge.” It absorbs light, making its shadows deep and its highlights soft and diffused.
The Common Trap:
The fast way is to drybrush a lighter color over a dark base. This can work, but it often looks “dusty” or “chalky,” which isn’t right for such a rich fabric.
The Masterclass Technique:
Deep, Saturated Shadows: Start with a dark, rich color (like a deep wine red or royal purple). Make your shadows even darker by mixing in a dark blue or black. Velvet’s shadows are its most important feature.
Stipple, Don’t Highlight: Do not use edge highlights. Instead, take your highlight color (your base + a little white) and stipple it on. This means painting with tiny dots, or very small, soft glazes, only on the areas where light would just catch the fuzz.
The Ultra-Matte Finish: This is the most critical step. You must finish velvet with an ultra-matte varnish. Any shine, even a satin one, will instantly shatter the illusion.
How to Paint Thin/Sheer Cloth (The Glazing Method)
This is for painting veils, wispy ghost-cloth, or thin gauze. This technique is, by definition, glazing.
The Masterclass Technique
Paint What’s Underneath First: This is the key. You must completely finish painting the skin, armor, or whatever is under the sheer cloth.
Tint, Don’t Paint: Mix your cloth color (e.g., white for a veil) with a lot of Glaze Medium or water. You want to create a translucent tint, not an opaque paint.
Controlled Application: Gently apply this glaze over the “under” surface. You’re not “painting” the veil; you’re “tinting” the skin beneath it.
Build Opacity in the Folds: Here’s the pro-trick: where the cloth would fold over itself, it would be less transparent. In those folds only, apply a second or third layer of your glaze. This builds up the color in the recesses and makes the “flat” areas look even more transparent.
How to Paint Wool & Coarse Cloth (The Texture Method)
This is for heavy wool cloaks, canvas bags, or rough-spun tunics. We need to create a visible, rough texture.
The Masterclass Technique
Stippling is King: Stippling your base coat with a sponge or a rough brush is a fantastic way to break up the smooth surface and create an instant, random texture.
Shade and Highlight: Apply your shades and highlights as normal over this stippled base.
Cross-Hatching: After your highlights are done, take a tiny brush (a 00) and your brightest highlight color. Paint a few, tiny, visible lines in a cross-hatch pattern (#) on the most raised areas. This simulates the weave of the fabric and sells the “coarse” look.
Matte Finish: Like velvet, wool is not shiny. A good matte varnish is essential to sealing the effect.
See It for Yourself
You don’t have to look far to see these techniques in action. Check out these two different versions of Medusa, painted by our own team and community.

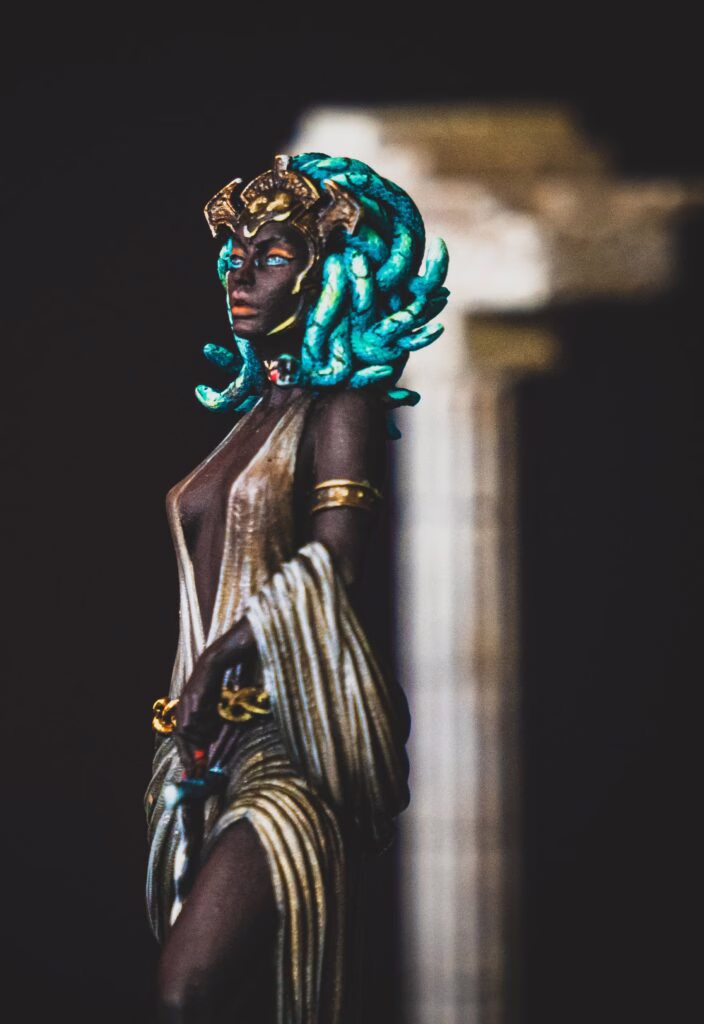
Julio de Araujo’s Medusa (Left): This is a perfect example of the “Silk” method. That purple cloth, draped in the front, uses sharp highlights and deep shadows to create a stunning, silk-like texture.
Márcia Georgina’s Medusa (Right): This version, on the other hand, demonstrates a masterful use of layering and texture to give a different, but equally impressive, fabric effect that feels more matte and magical.
Both are a symphony of technique, and they should be your guiding stars on this journey.
Final Thoughts
Your brush is your voice, and the fabric on your miniature is a canvas for storytelling. Each thread weaves a tale of texture and hue. Patience and practice are what meld creativity with imagination. Let your hands explore, let your eyes observe the subtle play of light, and above all, let your heart guide your brush.
Loot Studios can help you paint highly detailed minis, statues, and props. Choose your favorite bundle from our previous releases or sign up for Fantasy or Sci-Fi to receive a new bundle every month. You can also check out some tips on our YouTube Channel.

